"I want one white and one brown, but I'm fifty pence short, mate..."
Monday, 22 June 2015
Catching up
About six months ago, I let my starter die.
I was seduced by Richard Bertinet's book, Dough, and in particular, his French country loaf. I'd not really done any yeasted bread before, so I was surprised by how good the flavour was. About three months after discovering him, I'd neglected my starter. A further six months on, I've grown tired of bland yeasted bread. So I've whipped up a new starter and I'm back off to the sourdough races.
Recent loaves.
I'd pretty much stopped making high hydration bread, and I'd moved away from miches. My daily bake had become a white flour, low hydration boule that made the best toast and sandwiches ever. So I'm trying to get back to baking that, but I'm currently out of white flour, so I'm making it today with Matthews 6 grain flour.
The recipe is a deviation from Dan Leppard's White Leaven Bread from The Handmade Loaf, modified to reduce the hydration (and because I had no white flour.)
Recipe.
Leaven
50 grams of vigorous 100% starter 75 grams of white flour 75 grams of water
I use a 100% starter, which I find easiest to maintain. I keep a pot with about 150-200 grams in the fridge. I'f I'm baking, I replace what I take out. If I'm not baking, once a week I just take 100 grams out and add 50 grams water and 50 grams flour to your starter.
Mix these together and let them stand until the leaven has doubled in size. Time will depend on the temperature, but here in a mild English summer, it takes about four hours.
Final dough
When the 200 grams of leaven has doubled, add:
10 grams sea salt 500 grams flour. (Normally I'd use Sainsbury's white bread flour -- the cheap one -- but today I'm using Matthews 6 grains.) 290 grams water
This recipe should give you a loaf of 65% hydration. I know all the best recipes like 70% or higher, but I don't actually like the bread it produces. The holes are too big, so my jam falls through and it makes crap toast.
Anyway. mix your starter, your water, your flour and your salt and knead for about 10 minutes. I generally find 5 mins enough, but you want to mix until it forms a nice clean dough. Pop it in a floured bowl and let it rest for an hour.
After it's had an hour, knock it back, shape it into a boule and then pop it into your banneton or a bowl that's lined with a floured teacloth.
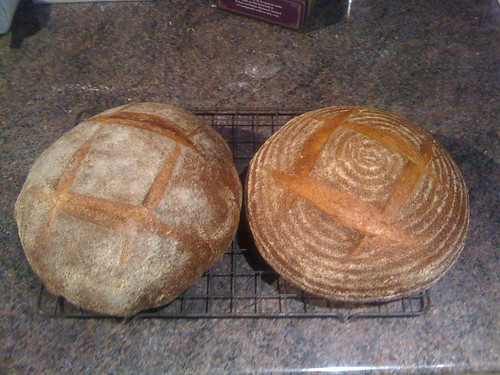
I've had a bit of French flour knocking around the house for a while, so I decided I was going to take another stab at a classical wet Pain de Campaign..
This was the style of bread that I started off trying to make. Eventually, I gave it up because my loaves just wen't turning out good. Oh sure, they were edible. Nothing you'd call bad. But they just didn't have that 'great' quality either. Given that I'd nailed that with my miche, I thought I'd take another shot at it.
The recipe that I was using comes from Andrew Lansley's book, Bread Matters. I like this book a lot. It's British, for one thing. It's aimed at the home baker rather than the professional. And he's passionate about his bread. So yeah, I do like this book a lot.
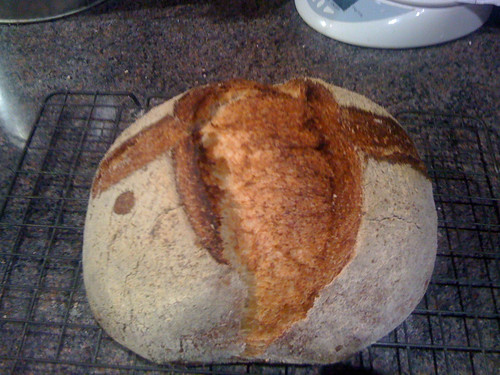
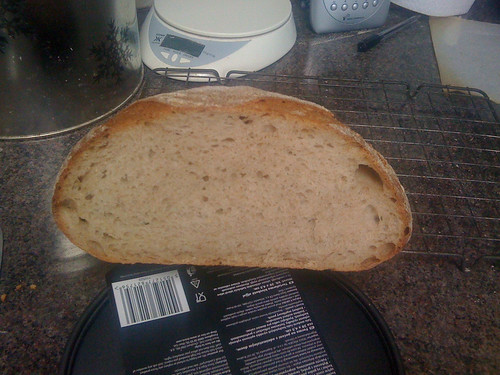
Anyway, I had a go at his recipe yesterday. Here's the outcome:
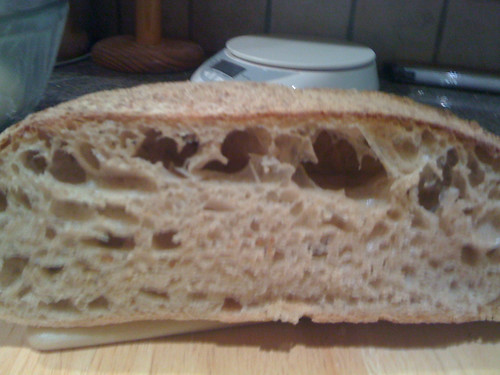
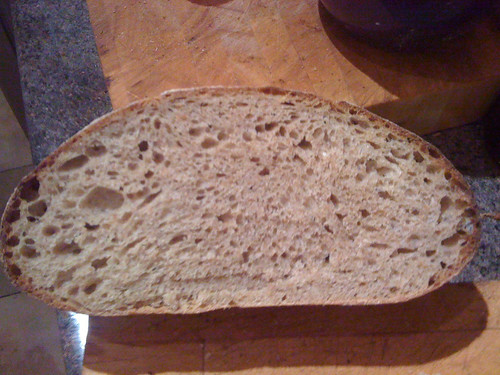
And here's a look at the crumb:
As usual, the taste of the bread is fine. But I'd like to be able to solve some of the aesthetic problems.
Lets look at the recipe
Stage 1: refresh the levain
160 grms wheat levain starter
50 grms stoneground wholemeal flour
150 grms strong white flour
Mix at about 27c and leave for 4 hours
Final dough
100 grms stoneground wholemeal flour
300 grms strong white flour
7 grms sea salt (I used 10 and still didn't think it was enough)
300 grms water
300 grms production levain.
Mix all the ingredients except the production levain into a dough and knead for about 10 mins -- until you start to feel the gluten.
Then combine the production levain and work it well into the dough. At this stage you can add more water or flour, depending on how tight or slack you want the dough..
Even at the end of kneading, the dough should still stick to your hands and worktop.
When the dough is well kneaded, wet a section of worktop and the rim of a glass bowl. Cover the dough with your bowl and let it rest on the worktop for an hour..
After an hour, stretch and fold the dough, starting with the furthest away edge and folding into the centre.
Then the front, and into the centre. And the sides.
You'll notice the dough tighten up and form a shaped boule. Dredge the dough in wholemeal flour and place, seam side up into a well floured banneton, then let it prove for around 4 hours.
When it's proved, turn it onto your peel, slash the dough and slip it into a preheated oven at about 220c. After 10 minutes, turn the heat down to 200c for a further 30 minutes until the loaf has a good strong coloured crust.
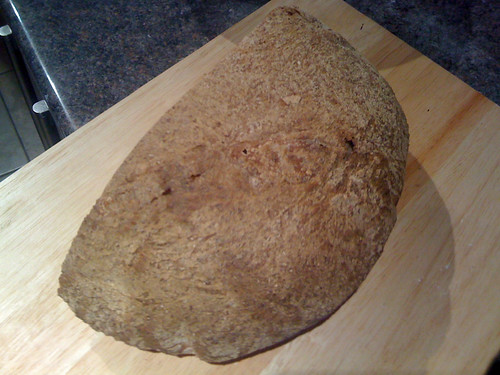
Well, everything went pretty much as it said on the tin. It's a very wet dough. My calculation makes it 73% hydration, and so the dough is very soft, very wet and very difficult to handle and work. This makes it hard to get good definition in your slashes, when you turn it out of the banneton, it doesn't hold it's shape at all -- simply drops to a pancake. When it's on the second prove, it still feels like wet dough -- even three or four hours in.
As you can see from the picture, although there is random holes, there are a large number of big holes at the top of the dough rather than distributed evenly throughout. Presumably that is because a with dough as wet as this one, all the air bubbles will rise to the top.
Although it was just a 73% hydration dough, it felt more like an 80% hydration. It was like working with a ciabatta dough or something. When I look at people working with wet doughs on YouTube, they've got a dough that they're able to work with.
Here's an example of the kind of wet but workable dough I'm trying to shoot for:
See that skin she gets? I just don't get that. My dough is still sticky -- even after the prove. I try to shape it, but it's just like I'm back to kneading again, the dough is that wet and sticky. The only way I can work it is by using wet hands/wet bench scrapers, etc.
So, does anyone have any idea what's going wrong here? Do I just need to drop the dough back to a dryer hydration? If I'm working with just white flour, that boule shapes pretty well identically to mine at 67% hydration. Am I underkneading? Overkneading? Something else?
I'd be really grateful for any hints as to what I'm doing wrong here Any thoughts, guys?
I don't want to come across as some sourdough baking expert here. What I can post about though, is what worked for *me*. I believe that the process of troubleshooting that I went through, can be helpful for anybody. I'm going to be talking about my standard miche recipe here again, because it's the one that I do that tastes the best, and that I've got absolutely nailed.
I initially went about making my starter in the usual way. Plain white flour and water, feeding/refreshing every 24 hours or so. There are a million sourdough starter recipes on the net. I'd steer clear of the wild and whacky varieties. You don't need pineapples or raisings or any of that stuff. I used Theresa's formula on Northwest Sourdough.
I can't recommend Theresa's site highly enough. Her free book, which you can download from the site, is at least as good as half of the books that I've bought. I used her sourdough starter, and it worked without any trouble. My first loaf was Theresa's recommended first loaf. And when I had problems, I used Theresa's forums to troubleshoot my problems.
So, using Theresa's recipe gives you a basic 100% hydration sourdough starter. This is what you'd use for most sourdough recipes. It's what I use if I'm making a basic white sourdough.
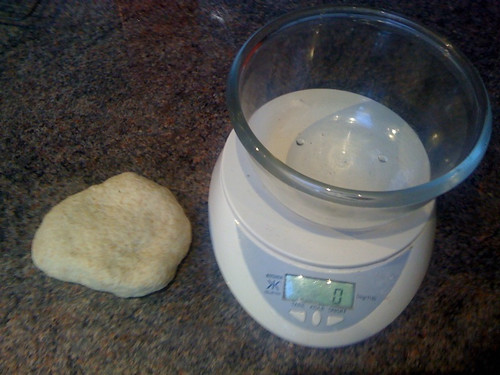
If I'm making my miche though, I want a firm biga-like starter (see picture above.) By creating the starter in multiple stages, we ensure that the activity of the yeast and other bacterias and enzymes are sufficiently active to give us a light and tasty loaf. So we go through three refreshment stages to get the starter in good condition to bake with.
Your timing doesn't have to be perfect when it comes to each of these stages. Refreshing aruond every 12 hours should be plenty, but you might be able to extend that to 24 hours per stage, or reduce it to 6 hours a stage, depending on how warm the temperature is and how active your starter is. The time it takes for your starter to double in volume will give you a good idea how long you need to take between refreshments. Here is my recipe for enough starter for one and two loaves.
Stage 1 6 grams of 100% hydration starter 8 grams of water 14 grams of flour [ 2 wholemeal, 1 spelt, 1 rye, 10 plain]
1 loaf 74 grams starter (all of stage 2) 28 grams of water 50 grams of flour [9 wholemeal, 5 spelt, 2 rye, 34 plain]
2 loaves 74 grams starter (all of stage 2) 66 grams of water 120 grams of flour [22 wholemeal, 12 spelt, 4 rye, 82 plain]
Sometimes I'll make up enough starter for a single loaf, sometimes I'll make up enough starter for two. If I do make enough starter for two, sometimes I'll make enough dough for two loaves all at once, other times, I'll make up enough dough for a loaf at a time.
Whichever I'm doing, the first thing I do is cut off 28 grams of starter for my next bake. That way, I can go directly to Stage 2. Then, I'll either divide the remainder of the starter into two, or use the lot if I'm making two loaves. There should be enough of this firm starter left for two batches of about 110 - 120 grams after you've put your 28 grams aside for the next bake.
Recipe for 1 loaf.
I'll go with my recipe for 1 loaf here. If you're wanting to make more than one loaf, just double the quantities.
As I think I already said, I'm aiming for a loaf that is a 67% hydration. This means that 67% of your dough will be made up of plain water. This is a relatively wet dough -- not a very wet dough. A pain ancienne or a ciabatta dough might be in the high 70's, and many artisan sourdough loaves tend to be around 70% hydration. This will give you the large holes and the open structure that you're looking for, but it's a lot harder to work.
Because this dough is around 50% wholemeal flour, it can take a relatively high hydration, but I don't like my hydration too high. I want a loaf that I can shape well, that'll give me good oven spring and a fairly closed while still irregular crust.
OK, here's how I do it. With pictures.
Ingredients Soaker /autolyse stage 115 grams ripe biga-like sourdough starter 312 grams water approximately 78c. 90 grams Bacheldre Mill Wholewheat Flour 40 grams Dove Farm Wholegrain Spelt Flour 14 grams Dove Farm Rye Flour 100 grams Waitrose Extra Strong Canadian Wholewheat Bread flour
Break up my starter into small balls and drop them into my mixing bowl. As I said, it should be about 115 grams of ripe, puffy, biga-like starter.
Add your water, then add the 90 grams Bacheldre Mill Wholewheat, 40 grams Dove Farm Spelt, 14 grams Rye, 100 grams Strong Canadian Wholewheat.
Use your scraper to combine the flour and starter well, and you'll have a soaker the consistency of mud. I let these flours and water soak together for at least an hour, but another hour or two isn't going to hurt it, and may well improve it.
After your soaker stage has had about an hour, it's time to make it into the final dough. I use:
9 grams Malden Sea Salt 111 grams Sainsburys Strong White Bread Flour 111 grams Waitrose Canadian Extra Strong White Bread Flour.
Mix the dough, the salt and the two white flours into your autolyse/soaker stage. It's really important not to forget the salt. Salt is critical to gluten development. Without it, you just get a sticky mess.
When salt and flour is mixed in, tip the whole lot out onto your counter and knead your dough for 10 to 15 minutes. Knowing when dough is sufficiently kneaded is something that you can tell mostly by feel. The more you do it, the better at it you get. What you're looking for is a silky smooth dough that's stretchy and feels good. However, wholewheat doughs are never quite as smooth and silky as white doughs, even with the extra water added.
So, I knead for about 12 minutes. After 3 or 4 minutes, I stop for a minute or two to let the dough rest. That makes it much easier to knead when the dough goes slack again. After a few minutes, you'll feel it tightening up again. Take another break and give the dough another rest.
When the dough has had it's full time, roll it into a ball, cover it with flour or peanut oil so that it doesn't stick to the sides, and pop it into a clingfilm covered bowl for an hour.
After an hour, I bring it out and give the dough a couple of stretch and folds.
Back into the bowl, another hour, another set of stretch and folds.
After the second hour, I'm waiting for the dough to double in volume. In this weather, in my kitchen, that takes about two hours. In summer, it was taking less than one. Keep in mind two things:
There's no need to rush it. It's really hard to overprove sourdough. Sourdough is supposed to be slow. The slower the better. The longer it takes, the more time flavour has to develop.
When your dough has finally doubled in size, we're going to shape the dough. I tend to prefer to make a boule -- a round, ball like loaf -- mostly because it's easiest to do. I suggest you go to YouTube and watch the videos on shaping boules.
Then, when your loaf is shaped, you're going to leave it for it's final prove. Again, in this weather, I like to give it around four hours at the ambient temperature of my kitchen. If you chill the dough, you can let it have anywhere from 8 hours to 20 hours or so.
When the proving is over, it's time to pop it into the oven.
Notes on troubleshooting
There were a handful of things I had to do before I could consistently make great bread and so I'm going to list them here before I give my detailed recipe.
1.) Stick to a single formula -- if you're changing your bread recipe all the time, you'll never get it right. Pick a single recipe and then stick to it.
2.) Modify a single variable at a time. If you think hydration is a problem, increase or reduce hydration several % each time you bake. Similarly, if you suspect time might be the problem, increase or reduce the time each time you bake.
3.) Aim for consistency. Make your changes in consistent, measured steps. Then try and judge if your change has made an improvement or not.
4.) Record your experiments. There's a lot to go wrong with sourdough. Take notes and take pictures.
5.) If you're floundering, ask for help. People on the forums are really helpful. Join a baking forum and ask your questions there. Or ask me.
Just a picture of a couple of loaves to show how my quest for quality and consistency is going. This bread is absolutely fantastic. Wonderful flavour, wonderful texture, the closest I've come to bread perfection.
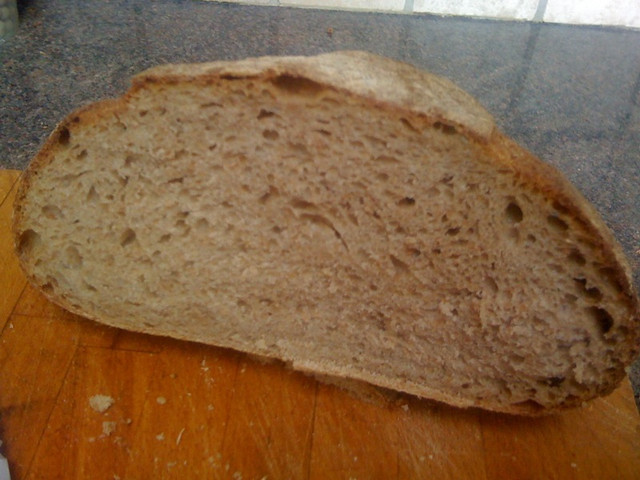
Crumb shot
And here's a picture of the crumb, so you can see how wonderfully light and airy it is. Now that I've got the wholemeal down, I'll start trying to get the white bread sorted.
Since I had my masterclass with Theresa and Ice over on Northwest Sourdough, my baking has gone from strength to strength.
My daily loaf is what I call 'Another Place Miche', but it's based largely on a recipe by queen of the online miches, Shiou-Ping. My loaf is based upon her Gerard Rubaud miche, with some minor adjustments. I substitute 100 grams of her white flour with 100 grams of Waitrose's extra-strong wholemeal flour, so the loaf is now approximately 50% white flour, 45% wholewheat, and the other 5% being a mixture of spelt and rye. Hydration is 67%.
Here are a couple I knocked up this week. Nothing special -- they're pretty well this good every time I bake one now. I've just about got it down.
Perhaps I'll submit them to Yeastspotting this week. I think they're good enough.
74 grams starter (from stage 2)
28 grams water (if doubling quantities, use 64 grams water)
50 grams flour (9 grams wholewheat, 5 grams spelt, 2 grams rye, 34 grams strong white flour.)
(If doubling quantities, I use 64 grams water, 20 grams wholewheat flour, 10 grams spelt, 4 grams rye, 80 grams of strong white bread flour.)
Whether you're making one loaf or two, you wamt to have 28 grams of starter left over so that you can use it as your stage 2 starter for your next loaf. Before you're ready to bake, take off 28 grams and put it in a container. Leave it on your conntertop, or pop into the fridge.
Mix the 115 grams starter from stage3 into 312 grams of warm water. Add 190 grams of wholemeal flour, 40 grams of spelt and 14 grams of rye. Mix thoroughly, cover, and allow to stand for an hour or two.
After two hours, add 8 grams ground sea salt and 222 grams strong white bread flour and knead your dough for around 10 mins.
Oil a bowl pop your dough in and cover for an hour. After an hour, stretch and fold, and then back into the bowl for another hour. After the second hour, stretch and fold the dough then back into the bowl and cover again.
Wait until the dough has doubled in volume. At the moment, with kitchen temp at about 18 degrees c, that's taking about four or five hours from mixing the dough.
When the dough has doubled in volume, get it out and shape into a boule, then pop it into a lined bowl or banneton amd wait until the dough has doubled in size again.
Pre-heat the oven for half an hour (or more, depending on the size of your oven stone. At the moment, I'm using a pizza stone which does fine.) My oven is a fan assisted oven, and I heat it at the max,. 245 c.
Slash the top of your dough -- I use the classic hash slash -- pop it onto your oven stone, liberally apply steam to your oven using whatever method you prefer (I use a combo oven dish filled with a cup of boiling water, and spritzes of water every two mins for the first 8 mins.
For a single loaf, I bake for 10 minutes at 245 c, then turn down to 235 c for an additional 10 mins. Then, I turn down to 200 for the last 10 mins, upending the loaf 5 minutes before it's due to come out to make sure the loaf is evenly browned on the bottom.
After 30 mins, I rap the bottom to make sure it sounds hollow. If it doesn't, give it an additional 5 minutes, but usually it's fine after 20 mins.
I said in my last post that I felt as though I'd made a breakthrough in my baking. Since then, I've baked another three or four loaves, using the same basic recipe, but with slight adjustments -- to the starter -- I didn't have enough of the firm starter that I normally use for this recipe, nor did I have the three days that it needs to make it -- so I reverted to my usual 100% hydration starter.
And of course, that throws out your hydration levels.
I suspect that many of my problems in the past have been a consequence of inaccuracy around my hydration levels. I'd been relying on one of the many on-line calculators. Maybe it worked and it was just me being careless? Maybe it was rubbish? And I don't think I ever used the same calculator twice.
Last week though, I discovered what I feel to be the best of all the online calculators for doing hydration levels. It's simple. It's graphic, so it's easy to read and to use. Here's a link. Have a little play around with it.
Anyway, having nailed my hydration level issue, there were a couple of other issues that needed nailing. Shaping, and adequate proofing times.
In the past, I'd simply go by what the recipe said. If it told me to bulk ferment for two and a half hours, that would be what the loaf would get. Yes, they always said that you have to go by how the dough feels -- but unless you know what proper dough feels like at the various stages, you're just kinda guessing.
And it shows in the loaf.
Looking back, I can see that my sourdough loaves have always been a bit underproved, a bit underdeveloped. Well, sometimes it was a bit -- and sometimes it was a lot.
The loaves were edible. They tasted great. But the crumb was *really* tough -- even when the loaf had risen enough.
I wasn't getting enough air in. The bulk ferment wasn't right. The proving wasn't right. The shaping wasn't right either. Hang on a sec:
Formula
Kneading
Bulk ferment
Proving
Shaping
That's just about *everything* that needed improving...
OK, lets take it from the top, and I'll use the loaf I baked last night as an example.
As I said, the recipe I was using was based on Shiao Ping's Gerard Rubaud Miche. I didn't need such a humungous loaf though, and I didn't have the three days to buld her biga-like starter, so I just wanted to whack it out using the starter I had in my fridge -- which was nice and ripe, but was 100% hydration.
So the recipe went:
150g ripe sourdough starter
292g water
90g wholewheat flour
40g spelt flour
14g rye flour
322g white flour
Mix the starter and the water together, and then add the various flours.When they're well mixed, cover the bowl for 25 mins to let the dough autolyse -- then add your 10g salt and start kneading the dough.
I know people say that you don't need to knead after autolysing. Personally, I've tried it both ways, and it comes out better with kneading. I give it about 10 mins using the Bertinet Method of kneading. Then, I make a ball, oil my glass mixing bowl, slap it it in and cover it with cling film.
After 30 minutes, I do a series of stretch and folds. I like to alternate my stretch and fold methods, so if I start using the envelope fold method, the next time I'll use Bertinet's stretch and fold technique.
I don't know if the style is crucial, but I think that it's crucial that you do them. It seems to really help in developing the gluten and getting a good, solid skin when you shape your dough later.
So, I do four lots of stretch and folds doing a set after 30 minutes. After my final set, I leave the dough alone until it doubles in size. I'm checking the sides of my glass bowl to make sure that I've got good, even aeration throughout the dough. If I've got both of these things -- which generally takes between an hour and a half to two hours, *after* my last set of stretch and folds -- then I'm ready to get my dough out of the bowl and stat shaping.
Shaping is something that I struggled with in the past as well, but that was because I wasn't giving my dough enough time to develop. Once I had, the whole thing became much easier to work with. So, I'd form a boule. Let it rest on the counter for five minutes. De-gas and flatten into a circle, then reshape into a boule for the second time. Another five minute rest. Then, do your second shaping.
There are a whole pile of YouTube videos that demonstrate shaping a boule. As long as your dough is sufficiently matured, theu're all good. Here, check it out. Reinhart again:
Once you've got your shaped boule, slap it into the Banneton to prove.
In the past, I was giving my loaves around an hour or an hour and a half to prove. That seemed right. It was what the recipe generally said. If you went by the size of the dough ball that I began with after mixing my dough, it was definitely double that size. And wouldn't the oven spring take care of any additional growth?
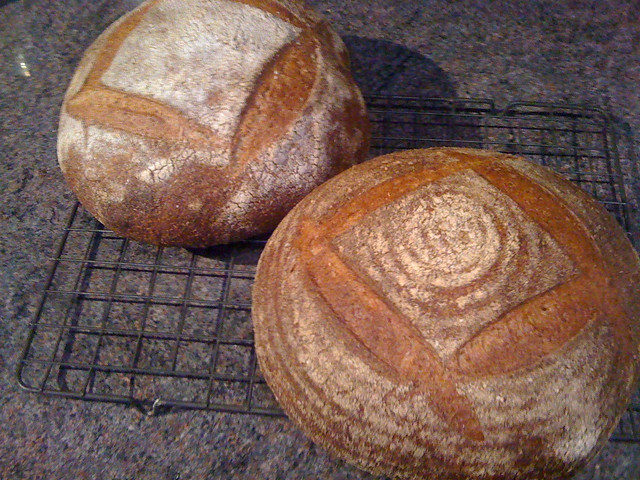
If you scroll back in my blog, you can see what my earlier loaves look like. As I said, they weren't bad. They tasted good. But some were better than others. I didn't have any consistency. Now, I believe I've cracked that. Check the loaf that I posted in my previous blog entry. And now check this one:
So now, I feel like I can move on to bake other breads having finally mastered the fundamentals of sourdough.