(For Jon Derricott)
I don't want to come across as some sourdough baking expert here. What I can post about though, is what worked for *me*. I believe that the process of troubleshooting that I went through, can be helpful for anybody. I'm going to be talking about my standard miche recipe here again, because it's the one that I do that tastes the best, and that I've got absolutely nailed.
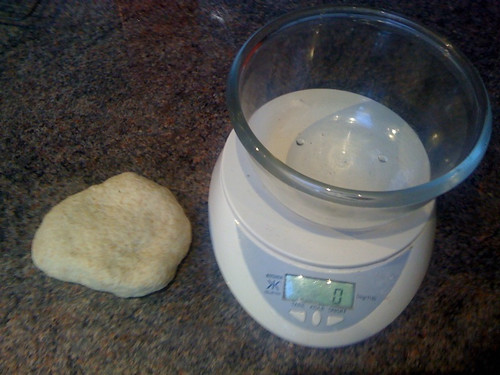
Biga-style sourdough starter, a photo by flimbag on Flickr.
Sourdough starter.
I initially went about making my starter in the usual way. Plain white flour and water, feeding/refreshing every 24 hours or so. There are a million sourdough starter recipes on the net. I'd steer clear of the wild and whacky varieties. You don't need pineapples or raisings or any of that stuff. I used Theresa's formula on Northwest Sourdough.
I can't recommend Theresa's site highly enough. Her free book, which you can download from the site, is at least as good as half of the books that I've bought. I used her sourdough starter, and it worked without any trouble. My first loaf was Theresa's recommended first loaf. And when I had problems, I used Theresa's forums to troubleshoot my problems.
Theresa's starter recipe is here.
So, using Theresa's recipe gives you a basic 100% hydration sourdough starter. This is what you'd use for most sourdough recipes. It's what I use if I'm making a basic white sourdough.
If I'm making my miche though, I want a firm biga-like starter (see picture above.) By creating the starter in multiple stages, we ensure that the activity of the yeast and other bacterias and enzymes are sufficiently active to give us a light and tasty loaf. So we go through three refreshment stages to get the starter in good condition to bake with.
Your timing doesn't have to be perfect when it comes to each of these stages. Refreshing aruond every 12 hours should be plenty, but you might be able to extend that to 24 hours per stage, or reduce it to 6 hours a stage, depending on how warm the temperature is and how active your starter is. The time it takes for your starter to double in volume will give you a good idea how long you need to take between refreshments.
Here is my recipe for enough starter for one and two loaves.
Stage 1
6 grams of 100% hydration starter
8 grams of water
14 grams of flour
[ 2 wholemeal, 1 spelt, 1 rye, 10 plain]
Stage 2
28 grams starter (all of stage 1)
16 grams water
30 grams flour
[5 wholemeal, 3 spelt, 1 rye, 21 plain]
Stage 3
1 loaf
74 grams starter (all of stage 2)
28 grams of water
50 grams of flour
[9 wholemeal, 5 spelt, 2 rye, 34 plain]
2 loaves
74 grams starter (all of stage 2)
66 grams of water
120 grams of flour
[22 wholemeal, 12 spelt, 4 rye, 82 plain]
Sometimes I'll make up enough starter for a single loaf, sometimes I'll make up enough starter for two. If I do make enough starter for two, sometimes I'll make enough dough for two loaves all at once, other times, I'll make up enough dough for a loaf at a time.
Whichever I'm doing, the first thing I do is cut off 28 grams of starter for my next bake. That way, I can go directly to Stage 2. Then, I'll either divide the remainder of the starter into two, or use the lot if I'm making two loaves. There should be enough of this firm starter left for two batches of about 110 - 120 grams after you've put your 28 grams aside for the next bake.
Recipe for 1 loaf.
I'll go with my recipe for 1 loaf here. If you're wanting to make more than one loaf, just double the quantities.
As I think I already said, I'm aiming for a loaf that is a 67% hydration. This means that 67% of your dough will be made up of plain water. This is a relatively wet dough -- not a very wet dough. A pain ancienne or a ciabatta dough might be in the high 70's, and many artisan sourdough loaves tend to be around 70% hydration. This will give you the large holes and the open structure that you're looking for, but it's a lot harder to work.
Because this dough is around 50% wholemeal flour, it can take a relatively high hydration, but I don't like my hydration too high. I want a loaf that I can shape well, that'll give me good oven spring and a fairly closed while still irregular crust.
OK, here's how I do it. With pictures.
Ingredients
Soaker /autolyse stage
115 grams ripe biga-like sourdough starter
312 grams water approximately 78c.
90 grams Bacheldre Mill Wholewheat Flour
40 grams Dove Farm Wholegrain Spelt Flour
14 grams Dove Farm Rye Flour
100 grams Waitrose Extra Strong Canadian Wholewheat Bread flour
Break up my starter into small balls and drop them into my mixing bowl. As I said, it should be about 115 grams of ripe, puffy, biga-like starter.

Add your water, then add the 90 grams Bacheldre Mill Wholewheat, 40 grams Dove Farm Spelt, 14 grams Rye, 100 grams Strong Canadian Wholewheat.
Use your scraper to combine the flour and starter well, and you'll have a soaker the consistency of mud. I let these flours and water soak together for at least an hour, but another hour or two isn't going to hurt it, and may well improve it.

Final dough stage
After your soaker stage has had about an hour, it's time to make it into the final dough. I use:
9 grams Malden Sea Salt
111 grams Sainsburys Strong White Bread Flour
111 grams Waitrose Canadian Extra Strong White Bread Flour.
Mix the dough, the salt and the two white flours into your autolyse/soaker stage. It's really important not to forget the salt. Salt is critical to gluten development. Without it, you just get a sticky mess.
When salt and flour is mixed in, tip the whole lot out onto your counter and knead your dough for 10 to 15 minutes.
Knowing when dough is sufficiently kneaded is something that you can tell mostly by feel. The more you do it, the better at it you get. What you're looking for is a silky smooth dough that's stretchy and feels good. However, wholewheat doughs are never quite as smooth and silky as white doughs, even with the extra water added.
So, I knead for about 12 minutes. After 3 or 4 minutes, I stop for a minute or two to let the dough rest. That makes it much easier to knead when the dough goes slack again. After a few minutes, you'll feel it tightening up again. Take another break and give the dough another rest.
When the dough has had it's full time, roll it into a ball, cover it with flour or peanut oil so that it doesn't stick to the sides, and pop it into a clingfilm covered bowl for an hour.
After an hour, I bring it out and give the dough a couple of stretch and folds.
Back into the bowl, another hour, another set of stretch and folds.
After the second hour, I'm waiting for the dough to double in volume. In this weather, in my kitchen, that takes about two hours. In summer, it was taking less than one. Keep in mind two things:
There's no need to rush it. It's really hard to overprove sourdough.
Sourdough is supposed to be slow. The slower the better. The longer it takes, the more time flavour has to develop.
When your dough has finally doubled in size, we're going to shape the dough. I tend to prefer to make a boule -- a round, ball like loaf -- mostly because it's easiest to do. I suggest you go to YouTube and watch the videos on shaping boules.
Then, when your loaf is shaped, you're going to leave it for it's final prove. Again, in this weather, I like to give it around four hours at the ambient temperature of my kitchen. If you chill the dough, you can let it have anywhere from 8 hours to 20 hours or so.
When the proving is over, it's time to pop it into the oven.
Notes on troubleshooting
There were a handful of things I had to do before I could consistently make great bread and so I'm going to list them here before I give my detailed recipe.
1.) Stick to a single formula -- if you're changing your bread recipe all the time, you'll never get it right. Pick a single recipe and then stick to it.
2.) Modify a single variable at a time. If you think hydration is a problem, increase or reduce hydration several % each time you bake. Similarly, if you suspect time might be the problem, increase or reduce the time each time you bake.
3.) Aim for consistency. Make your changes in consistent, measured steps. Then try and judge if your change has made an improvement or not.
4.) Record your experiments. There's a lot to go wrong with sourdough. Take notes and take pictures.
5.) If you're floundering, ask for help. People on the forums are really helpful. Join a baking forum and ask your questions there. Or ask me.